The order, and why it is the whole argument
Step 1 — Wheels and tires, before anything touches the paint
Wheels carry the dirtiest material on the car: bonded iron particles from brake rotors, mixed with oily pad residue and road film. If you wash the body first, your mitt and your wash water are contaminated before you reach the lower panels — and that contamination is abrasive. Wheels first, with their own bucket and their own brushes, is not fussiness; it is the cheapest scratch prevention available.
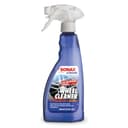
Non-acid is the default, not a compromise. Acid cleaners etch polished aluminum and attack clear-coated and painted wheels, and SONAX Wheel Cleaner Full Effect changes color as it reacts with embedded iron, which tells you when it has done its work rather than leaving you to guess. Clean wheels cold— a hot wheel flashes any cleaner dry before it can react. Full field: best wheel cleaners, and the brushes that go with them at best wheel brushes.
Step 2 — The wash: pH-neutral soap and a clean mitt
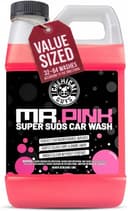
Two products, one step, and the pairing matters. A pH-neutral shampoo lifts dirt and rinses clean without stripping the wax or sealant underneath it, which is the entire point of washing rather than degreasing. Chemical Guys Mr. Pink is our pick because it is a high-dilution concentrate — so the cost-per-wash is low even though the bottle is not the cheapest — and it foams well enough to work in a bucket or a foam cannon.
What you must not use is dish soap. Chemical Guys’ own guidance is that it removes wax and sealant layers, can deteriorate paint protection film and shorten a ceramic coating’s life, and — not being pH-balanced for automotive surfaces — may dry out rubber seals and trim. It is a false economy measured in the protection you just paid for. We take it apart in can you use dish soap on a car.
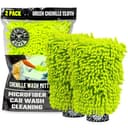
The mitt is the other half. A chenille microfiber mitt has deep fingers that lift grit up away from the paint instead of dragging it across the surface, which is what a sponge does. Use it with the two-bucket method— one bucket of soap, one of rinse water, grit guards in both — which is the technique Chemical Guys and Detailed Image both document, and the reason this site is called what it is. If you have a pressure washer, a foam cannon pre-soak removes a meaningful share of the dirt before the mitt touches anything.
Step 3 — Drying, which causes more damage than washing
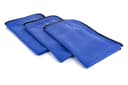
This is the step that gets improvised and it should not be. Pulling a bath towel or a chamois across paint drags whatever is still on the surface, and the marks that follow are blamed on the wash. A waffle-weave or twisted-loop microfiber drying towel holds many times its weight in water and is designed to be laid on and drawn flat rather than rubbed in circles.
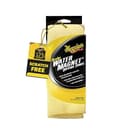
Two honest answers here. The Rag Company Dry Me A River is the better towel and the pick on our drying towel roundup. Meguiar’s Water Magnet is our budget row for a simple reason: it costs a fraction as much and it still beats the alternative most people reach for. If your choice is between a cheap microfiber towel and a bath towel, buy the cheap microfiber towel. Technique detail at how to dry a car without water spots, and the weave comparison at waffle weave vs twisted loop.
Step 4 — Decontamination, only when the paint needs it
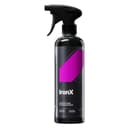
Run a hand over the paint after a wash. If it feels gritty rather than smooth, there is bonded contamination on it, and protecting over that seals it in. An iron remover dissolves the embedded brake and rail dust a wash cannot lift — CarPro IronX changes color as it reacts, which is a genuinely useful property on white paint where the staining is invisible.
Iron removal and claying are different jobs and both are occasional. Chemistry handles metal particles; a clay bar shears off the organic and overspray contamination that chemistry cannot reach. Most cars need this twice a year at most, which is why it is the one step on this page that is conditional. See iron remover vs clay bar and how to decontaminate car paint, and the full field at best iron removers.
Step 5 — Protection
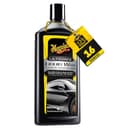
Everything up to here is removal. This is the only step that adds something, and it is what keeps the next few months of dirt from bonding as hard. Meguiar’s Ultimate Liquid Wax is a synthetic polymer that wipes on and off, lasts longer than a pure carnauba, and does not leave a chalky line on plastic trim — which is the mistake that makes people give up on waxing.
Two caveats worth stating plainly. First, work in shade on a panel that is cool to the touch: Chemical Guys publishes a 50–85°F working range and Turtle Wax says independently that direct sun bakes wax onto the surface. Second, if the reason you skip this step is the effort, the fix is a different format rather than more willpower — see best easy-to-apply car wax. Longer-lasting alternatives are at best paint sealants and best ceramic spray coatings.
Step 6 — Glass
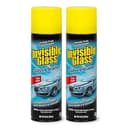
Glass comes after paint for a practical reason: wax and dressing overspray lands on it, and cleaning glass first just means doing it twice. The non-negotiable spec is ammonia-free, because ammonia hazes aftermarket tint and dries out rubber seals. Invisible Glass is ammonia-free and tint-safe, and it is the pick on our glass cleaner roundup.
Streak-free is mostly technique rather than product: spray the towel rather than the glass, use two clean towels, work in shade, and do the interior side with a separate towel because the film on it is different. Detail at how to clean car glass without streaks.
Step 7 — Tires, last
Dressing goes on last and it goes on a drysidewall. This is the step whose order is most often got wrong, and the consequence is specific: a dressing applied sloppily slings off the rotating tire onto the paint and the wheel faces you just cleaned, which is why clean wheels are dirty again four days later. Meguiar’s Endurance Tire Gel is a gel applied with a pad, so it stays where you put it rather than misting over everything nearby.
Apply thin, wipe the excess off the tread shoulder, and let it set before driving. Method at how to apply tire shine without sling, and the full field at best tire shine.
What this list deliberately leaves out
Machines. No pressure washer, polisher or vacuum, because none of them is required to detail the outside of a car well and all of them change the budget by an order of magnitude. A hose and two buckets do the wash; a pressure washer makes it faster and more fun. If you want the tool side of the question, that is best car detailing tools and best pressure washers for detailing.
Paint correction. Compounds, polishes and pads remove defects, which is a different project from cleaning and protecting. Swirls are not dirt and no product on this page will touch them. Start at best polishing compounds if that is the job.
Duplicates of things already on the list. There is no all-purpose cleaner here because the wheel cleaner and the shampoo cover the exterior jobs an APC would be used for; no second towel type, because one drying towel and one general microfiber do the work. The point of a shortlist is the subtraction.
The interior. Different surfaces, different chemistry, separate list: best interior detailing products. If the car needs a full reset inside and out, the two lists together are the whole shelf, and a wet/dry vac is the one machine that earns its place on the interior half.
How much of this do you actually need?
Fewer than eight products, if money is tight. In order of what we would buy first:
- A pH-neutral shampoo and a proper mitt. This is the step that prevents damage rather than fixing it. Nothing else on the list matters as much.
- A microfiber drying towel.Cheap or expensive, but microfiber. AAA’s guidance is that industry experts recommend washing roughly every two weeks, so this is a tool you will use dozens of times a year.
- A non-acid wheel cleaner. Because the wheels are the dirtiest part of the car and the one place dirt is genuinely corrosive.
- A wax or sealant. Twice a year is enough to change how the car looks and how easily it washes next time.
- Glass cleaner and tire dressing. Cosmetic, cheap, and the two that make a washed car look detailed. Buy them when the first four are covered.
- An iron remover. Last, because most cars need it twice a year and a bottle lasts a long time.
If you would rather buy one box than seven bottles, the all-in-one sets are at best car detailing kits — and our honest comparison of the two approaches is build your own kit vs pre-made kit. The condensed first-purchase version of this page is the beginner car detailing kit.
Our call
Buy the soap and the mitt first. A good wash with a clean mitt and two buckets does more for paint than any product further down this page, and it is the only step that is genuinely non-optional.
Then the drying towel, premium or budget. Both beat the thing most people use.
Then the wheel cleaner and the wax, in whichever order matches how your car looks right now. A filthy set of wheels spoils a clean car faster than dull paint does.
Glass cleaner, tire gel and iron remover last. Two are finishing touches and one is an occasional job. None of them is where a budget should start, and all three are cheap enough to add later without regret.
And keep the order. It is free, and it does more for the result than upgrading any single product on this list.