The Two-Bucket Wash Method
The wash technique this site is named after - two buckets, two grit guards, and a plush mitt keep the dirt off your mitt and out of your clear coat.
How this is funded:we earn a commission if you buy through our links, at no extra cost to you. It never changes which product we recommend, and we’ll tell you plainly when we’d skip one. Full disclosure.
What the two-bucket method is
The two-bucket method is the single simplest change you can make that keeps a car’s paint looking new. Instead of washing out of one bucket, you use two: one holds your soapy wash water, the other holds clean rinse water. Each pass, you load the mitt from the soap bucket, wash one section, then rinse the dirt out of the mitt in the rinse bucket before you reload. The dirt ends up in the rinse water instead of going back onto your paint.
Add a grit guardto each bucket — a plastic grate that sits in the bottom — and the system gets better still. You scrub the mitt against the grate, the dirt falls through, and the flat panels stop the water above from stirring it back up. Two buckets, two grit guards, and a plush mitt: that is the whole method, and it is where this site gets its name.
Nothing about it is expensive, complicated or new. It is the standard safe-wash procedure taught by every detailing manufacturer and trade body, and the total hardware cost is roughly what one drive-through wash costs. What follows is the full version: why it works, exactly what to buy, the step-by-step wash, and what each stage should look like as you do it.
Why a single bucket puts swirls in your paint
Most of the fine scratches you see on a hood in direct sun — the cobweb pattern people call swirls or marring — do not come from the road. They come from the wash. Every time you drag grit across clear coat under even light pressure, you cut a microscopic scratch. Do that a few hundred times over a car’s life and the surface dulls.
Where swirl marks actually come from
Picture washing out of one bucket. You wipe the lower door, pick up a load of road grit, and dunk the mitt back into your only bucket to reload. Now that grit is floating in the water you are about to wipe across the roof. A single-bucket wash quietly recycles the dirt you just removed and grinds it back into the paint. The soap is not the problem — the contaminated water is.
What the rinse bucket and grit guard do
The rinse bucket breaks that cycle. Dirt from the mitt goes into the rinse water, so the soap bucket stays clean and the mitt always reloads with clean suds. The grit guard then keeps the rinse bucket working longer: sediment drops below the grate and stays there instead of clouding the water your mitt has to pass through. Neither part is expensive, and together they do more for your paint than any wax.
How much that matters depends on what you are washing. Modern clear coat gives you some margin — wash marring can usually be polished out once or twice in a car’s life. Old paint on a classic or a project car does not: it is thinner, it has often already given up film to whoever polished it before you, and a respray costs more than every bucket, guard and mitt on this page put together. Our editor keeps a 1971 Mustang Mach 1 that sits in exactly that position — running and driving, with the paint and body work still to come — and photographs the car as it actually is in the Mach 1 build log at Steve’s Outpost, our sister site, which is a useful look at the kind of finish a careless wash does permanent damage to.
The grit guard, explained properly
The grit guard is the part people skip, usually because it looks like a plastic disc that costs ten dollars and does nothing. It is worth understanding what it is physically doing, because once you do, the technique that makes it work becomes obvious — and the technique is the part that matters, not the part.
How the grate works
A grit guard is a radial grate that sits an inch or two above the bottom of the bucket on short legs. Two things happen because of that gap. First, anything heavier than water — sand, road grit, brake dust — sinks through the openings and lands in the dead space underneath. Second, and less obviously, the vanes act as baffles: when you plunge a mitt into the bucket you create a turbulent swirl that would otherwise lift settled sediment straight back into suspension, and the vanes break that up. The water above the grate stays comparatively clear even while the water below it is filthy.
That second effect is the reason a grit guard is not simply “a filter.” A bucket with no guard also lets grit settle to the bottom. The problem is that it does not stay there for more than a few seconds of agitation.
The technique that makes it work
A grit guard you do not scrub against is decoration. The motion that matters is deliberate: push the loaded mitt down onto the grate and drag it across the ribs four or five times, opening and closing your hand so the pile of the mitt flexes and releases what it is holding. You are trying to physically pull grit out of the fibers, not rinse it. Then lift the mitt straight up rather than sweeping it sideways, which would stir the bottom of the bucket.
Some inserts add a raised washboard section for exactly this, which makes the scrubbing motion more effective and gives you somewhere obvious to do it. It is a genuine improvement rather than a gimmick, though the flat version works fine if you are conscientious about the scrubbing.
Yes, you want one in both buckets
The rinse bucket is the obvious one. The soap bucket is the one people leave out, and the reasoning for including it is simple: your mitt is never completely clean when it goes back into the soap, so a small amount of grit arrives there every single cycle. Over a whole car that adds up, and without a guard it is circulating in the water you are lifting straight onto the paint. Two guards is the correct answer; one, in the rinse bucket, is a workable compromise.
Two buckets, three buckets, or the 2x4 method
A third bucket, dedicated to wheels, is the most worthwhile addition to the system. Wheels carry sharp metal filings and heavy brake dust, and one pass with a wheel-contaminated mitt can mark a whole panel. Keeping wheel water, a wheel mitt and wheel brushes entirely separate is not fussiness, it is the difference between a safe wash and an expensive one.
You will also see the “2x4” approach discussed — two buckets per side of the car, four in total, so the mitt never travels across the vehicle with a load of grit in it. It is a real technique used by professionals on very dirty or very dark cars. For a normally-dirty daily driver it is more than you need. If you want a deeper look at the hardware question on its own, the do I need a grit guard guide takes that single decision apart.
What you need
- Two five-gallon buckets.Bigger is better — more water means the dirt is more diluted and the water stays usable longer.
- Two grit guards, one for each bucket, so both the soap and the rinse water keep sediment at the bottom.
- A pH-neutral car shampoo. A dedicated car wash soaplifts dirt while leaving your wax and sealant in place. Skip dish soap — it strips protection.
- A plush microfiber wash mitt. Deep pile pulls grit up and away from the surface, where it stays until you rinse it out. A thin sponge holds grit against the paint instead.
- A separate wheel mitt and, ideally, a third bucket just for wheels, which carry the sharpest grit on the car.
- A foam cannon or foam gun for the pre-soak, plus a big, clean drying towel. A foam cannon lays down a thick pre-wash that softens grit before contact.
The kit: buckets and grit guards
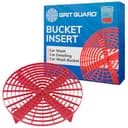
The one to buy twice
Grit Guard The Original Bucket Insert
The original radial grate, 10 inches across so it drops into any standard 3.5 to 6 gallon bucket. Buy two — one per bucket — and the hardware side of this method is finished for good.
$9.99View on AmazonPrice as of October 19, 2026. #ad How we’re funded
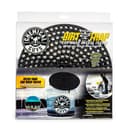
The finer filter
Chemical Guys Cyclone Dirt Trap Bucket Insert
A screen rather than an open grate, so it catches smaller particles and the water above settles faster. It is 12 inches, so measure your bucket before ordering.
$10.99View on AmazonPrice as of October 19, 2026. #ad How we’re funded
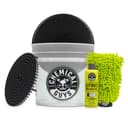
Starting from nothing
Chemical Guys Ultimate Car Wash Bucket Kit
Bucket, insert, mitt, soap and a sealing lid in one order. It is one bucket rather than two, but the second can be any bucket you already own.
$49.99View on AmazonPrice as of October 19, 2026. #ad How we’re funded
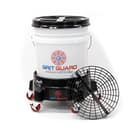
If you wash often
Grit Guard 5 Gallon Washing System (Black)
Bucket, guard, a rolling dolly and a screw-on Gamma Seal lid. The dolly is the reason to spend this: you push forty pounds of water around the car instead of lifting it.
$79.99View on AmazonPrice as of October 19, 2026. #ad How we’re funded
The kit: what goes in the buckets
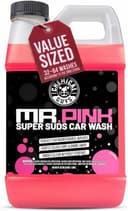
The soap
Chemical Guys Mr. Pink Super Suds Car Wash Soap
pH-neutral so it will not strip your wax, and concentrated enough that roughly an ounce does a five-gallon bucket — which is what makes the cost per wash so low.
$27.99View on AmazonPrice as of October 19, 2026. #ad How we’re funded
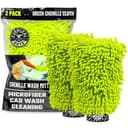
The mitt
Chemical Guys Chenille Microfiber Wash Mitt
Deep chenille pile is the point: it lifts grit up into the fibers and away from the paint, then releases it when you scrub it on the grit guard. A flat sponge does the opposite.
$17.98View on AmazonPrice as of October 19, 2026. #ad How we’re funded
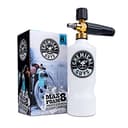
The pre-soak
Chemical Guys TORQ Professional Foam Cannon
The pre-wash foam that softens and lifts grit before your mitt makes contact. Less grit on the panel means less for the two buckets to deal with.
$99.97View on AmazonPrice as of October 19, 2026. #ad How we’re funded

The drying towel
The Rag Company Dry Me A River Waffle-Weave Drying Towel
Three waffle-weave towels, so you can dry each section as you go and still have a clean one for the glass. A gritty towel at the end undoes the whole wash.
$24.95View on AmazonPrice as of October 19, 2026. #ad How we’re funded
The wash, step by step
The step-by-step card below the FAQ has the exact sequence, but here is the logic so the steps make sense rather than being a checklist you follow blind.
- Set up before you get wet. Grit guards in both buckets, soap in one, plain water in the other. Doing this first means you are never tempted to skip the rinse step halfway through.
- Rinse and foam first. A pre-rinse knocks off loose dirt, and a foam pre-soak lifts and softens what is left. The less grit on the surface before you touch it, the less your mitt has to carry.
- Wash top to bottom, in straight lines.The roof and glass are cleanest; the rockers and bumper are filthiest. Working down keeps the dirtiest panels last. Straight front-to-back passes matter too — any scratch you do leave is straight and far less visible than a circular swirl.
- Rinse the mitt between every section. This is the step people skip, and it is the whole method. Scrub the mitt on the grit guard in the rinse bucket, then reload from soap.
- Wheels last, with their own kit. Brake dust and metal filings will shred a wash mitt and your paint. Keep them completely separate.
- Final rinse and a clean dry. Sheet the water off from the top, then dry with a fresh plush towel before the water spots. A dirty towel here can undo the whole wash in thirty seconds.
What each stage should look like
Almost every mistake in this method shows up visually before it shows up in your paint, so it is worth knowing what you are looking for. Photographs of a wash tend to flatter it; these are the things to check with your own eyes as you go.
The two buckets, side by side
Set them next to each other with the soap bucket on your dominant side. Within three or four sections the difference between them should be obvious: the soap bucket still white with foam and reasonably clear underneath, the rinse bucket visibly browner with a layer of sediment sitting under the grate. That contrast is the method working. If both buckets look the same by the time you reach the doors, you are not scrubbing the mitt hard enough on the guard, or you have gone back to soap with a dirty mitt at some point.
The foam on the panel
A good pre-soak sits as a thick, opaque white layer that clings for a few minutes and then starts to slide, carrying visible dirt lines down the panel with it. Thin, translucent foam that runs off immediately is either too weak a mix or a car that is too hot — move to shade. You should be able to see dirty streaks in the foam as it slides, and those streaks are grit that will now never reach your mitt.
The mitt as you lift it
Out of the soap bucket, the mitt should be heavy, saturated and dripping suds rather than merely damp. That weight is the lubrication doing the work. Out of the rinse bucket after scrubbing, it should look uniformly clean — if you can see a grey or brown tinge in the pile, put it back and scrub it again. Look at the palm side specifically, because that is the face that touches your car.
The panel under a light
The whole point is what you cannot see afterwards. Once the car is dry, look at a horizontal panel at a low angle with the sun behind you, or with a phone flashlight held close in a dark garage. New wash marring appears as fine, curved lines radiating from the light source. Existing swirls will still be there — this method prevents, it does not correct — but you should not be adding to them. If you are, the cause is almost always drying, not washing.
The bottom of the rinse bucket at the end
Tip both buckets out on the driveway when you finish. The rinse bucket should leave a visible deposit of grit and sand under where the guard sat. That pile is the entire argument for the method: it is exactly what would otherwise have been ground across your clear coat, and it is a genuinely useful thing to see once.
Common mistakes that undo the whole thing
The method only works if you avoid the habits it is designed to fix. These are the ones that quietly put the swirls back:
- Using one bucket. The most common mistake, and the one the whole system exists to solve. No rinse bucket means no method.
- Scrubbing in circles. Circular motion turns any stray grit into a visible swirl. Straight lines keep marks straight and hard to see.
- Reaching for dish soap. It strips wax, dries out trim and seals, and leaves the paint less protected than before you started.
- Washing wheels with the paint mitt. Wheel grit is the sharpest on the car. One pass with a wheel-contaminated mitt can scratch a whole panel.
- Drying with whatever towel is around. A gritty or lint-heavy towel drags the last of the dirt across dry paint. Finish with a clean, plush microfiber only.
- Letting the car dry in the sun. Foam and rinse water bake into water spots on hot paint. Work in the shade and keep panels wet until you dry them.
- Dropping the mitt and carrying on. A mitt that touches the ground has picked up grit no bucket will fully remove. Set it aside, get a clean one, and wash the dropped one properly before it goes near paint again.
- Never changing the water. Two buckets buy you time, not immunity. On a filthy car, dump and refill the rinse bucket halfway through rather than washing the second half out of mud.
Where to go from here
Once the two-bucket wash is second nature, it slots into the larger routine. See how to detail a carfor where the wash sits in a full detail — decontamination, correction, and protection all come after a safe wash, and none of them help if the wash itself is adding scratches. If you want the same lesson framed around avoiding damage, the companion guide on washing a car without scratching it walks through each swirl-causing habit and the fix. Get the wash right and everything downstream gets easier.
And if you have no hose or no driveway, the method still applies in a modified form — washing a car without a hose covers the rinseless version, which keeps the same principle of never returning a dirty medium to clean solution.
Frequently asked questions
Why do you need two buckets to wash a car?
The second bucket is a rinse bucket. Every time your mitt picks up dirt, you rinse it in the clean water before you reload from the soap bucket. That keeps the dirt out of your soap and off your paint. With one bucket, the same grit you just wiped up goes right back onto the panel.
What does a grit guard actually do?
A grit guard is a plastic grate that sits at the bottom of the bucket. When you scrub the mitt against it, dirt falls through and settles below the grate, where the flat panels stop the water above from swirling it back up. Your mitt draws from cleaner water on top.
Do you need a grit guard in both buckets?
Yes, and for two different reasons. The one in the rinse bucket does the obvious job of trapping the dirt you scrub off the mitt. The one in the soap bucket matters because a mitt is never perfectly clean when you reload it, so grit still arrives there — the guard keeps that small amount at the bottom instead of letting it circulate through the water you are about to lift onto the paint.
Can I use dish soap for the two-bucket method?
No. Dish soap is built to strip grease, so it also strips wax and sealant and dries out trim and seals over time. Use a pH-neutral car shampoo made to lift dirt while leaving your protection in place.
Do I still need to foam if I use two buckets?
Foaming is not required, but a foam pre-soak is worth it because it lifts and softens grit before your mitt ever touches the paint. Less grit on the surface means less for the two-bucket system to deal with. The two work together.
How often should I change the wash water?
Change the rinse water whenever it looks muddy, and dump both buckets if you are washing a very dirty car or a second vehicle. Clean water is the whole point - the moment the rinse bucket is as dirty as the soap bucket, the method stops protecting you.
Does the two-bucket method actually remove swirl marks?
No, and this is worth being clear about. The two-bucket method is prevention, not correction — it stops new swirls being added every wash, but it cannot remove marks that are already in the clear coat. Existing swirls need a polish, either by hand or with a dual-action polisher. The order that works is: fix the wash first, then correct, then protect, or you will simply re-mark the paint you just corrected.
What size buckets should I use?
Five gallons each, and bigger is genuinely better here rather than a preference. A larger volume of water dilutes the grit that comes off the mitt, so the rinse bucket stays usable for longer and the soap bucket stays cleaner. Standard grit guard inserts are sized for common 3.5 to 6 gallon buckets, so a pair of five-gallon buckets is both the practical and the compatible choice.
Sources
- Chemical Guys — Two Bucket Method Car Wash Guide — Manufacturer how-to on the two-bucket wash and grit guards (accessed July 19, 2026)
- Detailed Image (Ask a Pro) — The Grit Guard 2x4 Wash Method — Detailing knowledge base on grit-guard wash technique (accessed July 19, 2026)
- International Detailing Association — Detailing Resources — IDA's public detailing resource library (accessed July 19, 2026)
Keep reading
How to Wash a Car Without a Hose
The apartment-friendly wash - a bucket, towels and no runoff.
Read the guideHow to Detail a Car: The Full Process
Where the two-bucket wash fits in a complete home detail, start to finish.
See the full processBest Car Wash Soap
The pH-neutral shampoos that lift dirt without stripping your wax.
Compare soapsBest Foam Cannons
Thick pre-wash foam that lifts grit before your mitt touches the paint.
Compare foam cannonsHow to Wash a Car Without Scratching It
The habits that put swirls in paint, and the safe setup that avoids each one.
Read the guideDo I Need a Grit Guard?
The five-dollar question, taken apart - what the grate does and when it stops helping.
Read the guideHow Often Should You Wash Your Car?
Once the method is safe, frequency stops being a risk - here is the interval worth aiming for.
Read the guide