How to choose a car upholstery cleaner
1. Decide which of the three jobs you are actually doing
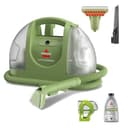
Almost every disappointing result comes from buying for the wrong one. A general clean is the whole carpet and all the seats looking uniformly better — that wants a foaming cleaner and a lot of it. A spot treatment is one coffee ring on the passenger seat, which wants a stain-specific formula and a fraction of the product. A deep clean is a car that smells, or has years of embedded grime, and no bottle solves that on its own because the dirt is at the base of the pile and there is no way to lift it out by hand. That is extractor territory. Buying a cheap bottle for a job that needs a machine is the most common mistake on this page.
2. Foam is not marketing — it is water control
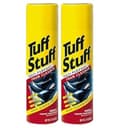
On a household carpet you can afford to soak the fibers, because the floor underneath dries and the room has air moving through it. A car seat has an inch or more of closed-cell foam under the cloth, a metal frame, and often heating elements and airbag hardware inside it. A high-foaming cleaner is designed to keep more of the product working at the fiber surface, where the dirt is, instead of running straight through into the padding. That is why foaming formulas dominate this category and why the aerosol picks here are worth their fixed strength.
3. Fiber safety and colorfastness
Car upholstery is not one material. Most cloth seats are polyester or a polyester-nylon blend, but you will also find natural-fiber blends, suede-look microsuede and Alcantara-style synthetics, and each responds differently. Buy a product whose listing explicitly states it is safe on natural and synthetic fibers, and then still test it — spray a hidden section under a seat or in the far corner of the trunk carpet, agitate lightly, blot with a white towel and look at the towel. Dye transfer onto the towel means stop. If you would rather start with gentler chemistry generally, the EPA’s Safer Choice program is a reasonable filter to apply before you buy anything.
4. What you do after the spray matters more than the spray
Every product here needs agitation. Cleaner alone loosens the bond between the dirt and the fiber; something physical has to break it. A soft interior detailing brush with a drilled-in pattern of short strokes does far more than a stiff brush scrubbed hard, which flattens and fuzzes the nap. Then the dirt has to leave: a clean, dry microfiber towel pressed into the fiber to blot — not wiped, which spreads it — or a wet/dry vacuum pulled slowly across the damp area. Skip that and you have redistributed the stain and added water.
5. Cost per usable ounce, not sticker price
A whole-interior clean is genuinely thirsty. Four seats, the carpet, the mats and the trunk will run through far more product than people expect, and a 16 oz bottle that looks cheap can turn into three bottles by the time the job is done. Compare the price shown on each row against the size in the specs table, and weigh a concentrate — which you dilute — differently from a ready-to-use spray. This is the same math that makes a diluted all-purpose cleaner so economical on floor mats, and it is why the value pick on this page is a multi-purpose foam rather than a boutique detailing bottle.
The over-wetting problem, and why it is the whole game
The single most common way a home upholstery clean goes wrong is putting in more water than you can take back out. A soaked seat looks fine while it is wet, then two things happen. First, as the padding dries from the bottom up, it wicks dissolved dirt back to the surface and leaves a ring — usually larger and more obvious than the stain you started with. Second, a damp, sealed cabin is a good environment for microbial growth. The US EPA’s guidance for water damage in buildings is that wet materials should be dried within 24 to 48 hours to prevent mold growth, and there is nothing about a car seat that makes that window longer. In practice a car is worse: smaller air volume, no ventilation with the doors shut, and a greenhouse temperature cycle every afternoon.
The practical rules that follow are simple. Use the least product that does the job, not the most. Work one panel at a time and extract or blot before moving on. Clean on a warm, dry day and leave the doors or windows open afterward, ideally with a fan pointed into the footwell. If the interior still feels cool and damp to the back of your hand after a few hours, it is not dry — keep air moving over it. And if a car already smells musty before you start, the smell has a source, and adding moisture will make it worse rather than better; our guide on getting smells out of a car works through finding the source first.
The routine that gets the most out of any of these
Vacuum thoroughly first. Every bit of loose grit you remove dry is grit you are not turning into mud. Get into the seams and under the seat rails, and if there is pet hair, deal with it before any liquid touches the cloth — wet hair binds into the fibers and becomes far harder to lift, which is why removing pet hair is its own step and its own technique.
Test, then work in panels. Hidden-area test first. Then treat one seat back, or one footwell, at a time. Spray lightly and evenly — enough to darken the fiber, not enough to make it squelch. Give it a short dwell so the chemistry can work, agitate with a soft brush, then blot or vacuum immediately. Repeat a light pass rather than going harder on the first one.
Treat stains separately, before the general clean. A dedicated stain formula on the specific mark, worked from the outside of the stain inward so you do not spread its edge, then the general cleaner over the whole panel so the cleaned patch does not stand out against everything around it. A perfectly clean circle in a dirty seat looks worse than either.
Dry it deliberately. Doors open, air moving, and do not put the mats back in until they are dry all the way through — mats trapped on damp carpet are where the musty smell starts. The full order for the rest of the cabin is in our interior cleaning guide, and the seat-specific version, including what to do differently on cloth versus leather, is in how to clean car seats.
Where an upholstery cleaner is the wrong tool
Leather and vinyl seats. A fabric cleaner is formulated to penetrate and lift out of a porous fiber. On coated leather it has nothing to penetrate, and the surfactants can strip the finish and dry the hide. Use a dedicated leather cleaner and conditioner instead — it is a two-minute job and cheaper than a re-trim.
Crevices, vents, seams and seat rails. A spray and a towel cannot reach into a vent slat or the channel where a seat base meets the backrest, and a wet product sitting in a seam is a drying problem. That is steam territory, and the trade-off between the two machine types is in steam cleaner vs carpet extractor — steam loosens with almost no water, an extractor removes with a lot of it.
Headliners. The fabric is glued to a backing board, and saturating it dissolves the adhesive. Headliner sag is close to unfixable at home. If you must clean one, use the lightest possible mist onto a towel, never spray directly at it, and accept a partial result.
Alcantara and microsuede. These are the materials most likely to mat, shine or discolor. They generally want a much gentler, purpose-made product and a very light touch, and the risk of a permanent shiny patch is real.
Deeply embedded odor. If the problem is smell rather than appearance, cleaning the surface will not fix it. Odor lives in whatever is causing it — spoiled milk under a seat, a leak wetting the carpet underlay, smoke residue on every surface at once. In some of those cases, steam or a full extraction is the only route, and occasionally the carpet has to come out. Once the source is dealt with, the odor eliminators cover what to treat the remaining smell with — and which mechanism matches which cause.
Buy for the job in front of you, keep the water under control, and cloth interiors clean up better than most people expect. It is the one part of a detail where a modest bottle and a careful technique beat an expensive bottle and a heavy hand every time.
Product choice is the smaller half of this job. The sequence — agitate, then extract, then dry properly — is what decides whether carpet comes out clean or comes back smelling; how to clean car carpet walks it step by step.