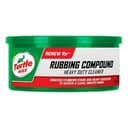
How to choose a scratch remover
1. The fingernail test decides what you buy
Run a fingernail across the defect at ninety degrees. A nail that glides straight over means the damage is inside the clear coat: swirl marks, wash marks, towel marks, a scuff from a bag, the halo around a door handle. Those are abrasive problems and they come out. A nail that catches means the groove is deeper than your nail’s edge, which in practice means it has reached or passed the base coat, and no amount of compound brings that back — it needs paint, not abrasive.
There is a second tell that costs nothing. Wet the panel. If the scratch disappears while the surface is wet and reappears as it dries, it is a clear-coat defect, and water is temporarily filling it to roughly the same refractive index as the clear around it. That is a very good sign. If it stays visible under water, it is deep, and the honest advice is a touch-up pen or a body shop rather than a bottle.
2. You are spending clear coat, so spend it once
This is the part most scratch-remover pages leave out, and it is why the order of the picks above matters. Every correction step removes material you cannot put back. DetailingWiki’s worked example puts a typical paint system at around 120 micrometers with roughly 40 micrometers of that being clear coat, and budgets about 10 micrometers of clear removed each time you polish a panel. On those figures you do not have many full corrections in a car — and the wiki is blunt that you should measure your own panel rather than trust any published average, ours included.
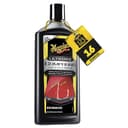
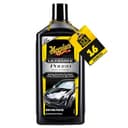
The practical consequence: always start with the least aggressive thing that could work. Try Ultimate Polish before Ultimate Compound, and Ultimate Compound before M105. Going straight to the heavy cut because the scratch looks bad is how people turn a cosmetic mark into a thin panel. Our guide to removing scratches from a car walks the technique; this page is about which product sits at each rung.
3. By hand or by machine — and when hand genuinely stops
A single scratch on a door is a hand job. Spread a pea of compound on a foam applicator, work a small area in overlapping passes with real pressure, wipe, inspect, repeat. Three or four rounds is normal, and most people quit after one.
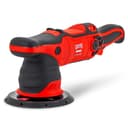
Hand stops being realistic at scale, not at difficulty. A whole hood of swirls is thousands of tiny scratches, and an arm cannot deliver consistent pressure over that area for long enough. That is the moment a dual-action polisher earns its price, and the reason the Griot’s G9 appears on a scratch-remover page at all. We cover the choice properly in can you polish a car by hand and dual action versus rotary.
4. Pads matter as much as the bottle
Cut is a product of abrasive and pad together, which is why a pad kit is a pick here rather than an afterthought. Run a finishing polish on a cutting pad and you get more correction than the bottle suggests; run a compound on a soft finishing pad and you get less. If you buy a machine, buy pads with it — how to choose a polishing pad explains the colour coding, and our pad roundup covers more options than the one kit above.
5. What this page is not
It is not the compound roundup. Best polishing compounds ranks compounds against each other on cut and finish for a full correction — a different question, asked by someone who has already decided to correct a whole car. This page triages one defect and is happy to answer “a polish, not a compound” or “a machine, not a bottle.”
It is also not a scratch fillerpage. Glazes genuinely hide fine marks for a few weeks by filling them with oils, and on dark paint that can be the right call — the black-paint wax page is built on exactly that argument. But filling is cosmetic and temporary, and selling it as removal is the main dishonesty in this category.
6. Finish the job: protect what you just exposed
Compounding strips whatever wax or sealant was on the panel and leaves fresh, bare, unusually clean clear coat behind. That is the best bonding surface a protection product will ever get, and the worst state to leave a car in. Wax or seal the area the same day — a synthetic sealant is the least effort for the most durability, and the order of detailing steps shows where correction sits in a full detail.
One last expectation to set. Removing the scratch is rarely the hard part — matching the gloss around it is. A corrected patch on an otherwise swirled panel reads as a bright spot, which is why detailers work a whole panel rather than a six-inch circle. If the rest of the car is marked up, budget for the panel, not the scratch.