How to choose a car interior detailing kit
1. Decide whether you are buying chemistry, tools, or both
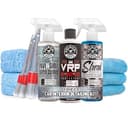
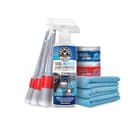
This is the whole decision, and it takes thirty seconds. Open the cupboard where your car stuff lives. If there are no soft brushes and no clean microfiber towels in it, you need a complete kit— one that includes both — and you should ignore the chemistry-only sets no matter how good the products in them are. If you already have brushes and a stack of towels, a complete kit is charging you for a second set of them, and a chemistry set gives you far more usable product for the money.
The trap is that both types are marketed with the same words. A “complete interior kit” can mean eleven items including three brushes and three towels, or it can mean six bottles and nothing else. Read the item list, count the tools, and price the gap. Brushes and towels bought separately are not expensive, but they are not free either, and a kit that omits them is a smaller purchase than its label suggests.
2. Count the towels and the brushes, not the bottles
Bottle count is the number kits advertise because it is the easiest one to inflate. It is also the least predictive of how the job goes. A dashboard with a season of dust in the vent slats does not need more product; it needs something with bristles that fits into a slat. Ground-in grime on a textured door card does not need a stronger spray; it needs agitation, because a flat towel only ever touches the high points of a textured surface.
Towels are the other quiet failure point. Interior work eats towels far faster than paintwork does — you are picking up actual dirt rather than spreading a thin film of wax — and a kit with one towel means you are wiping the second half of the car with the dirt from the first half. Three is a sensible working minimum, and if the kit has fewer, add a pack of general-purpose microfiber to the order. If the kit has no brushes at all, a set of soft interior detailing brushes is the single highest-value thing you can add to it.
3. Match the kit to the surface mix in your car
“Interior” is not one surface. A modern cabin is some combination of hard textured plastic, soft-touch coated plastic, glass, screens, and then either cloth or leather on the seats — and those last two want opposite things. Fabric chemistry is designed to penetrate a porous fiber and lift dirt out of it. Leather is a coated, non-porous surface where penetration is exactly what you do not want, and where a fabric surfactant can strip the finish and dry the hide underneath.
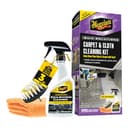
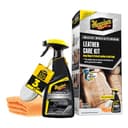
That is why two of the picks here are single-surface kits, and why they are not a lesser option. If your car has cloth seats and carpet that have gone gray with use, a dedicated cloth kit with a drill attachment will transform it in a way that no all-in-one spray can. If it has leather that has gone dull in the bolsters, a leather kit does the same. An all-surface kit is the right answer when the interior is generally tired rather than specifically dirty, or when you genuinely do not know where to start.
For a deeper read on the chemistry side of that split, the upholstery and carpet cleaners and leather cleaners and conditioners roundups compare the individual bottles, and APC vs dedicated interior cleaner covers when a strong all-purpose concentrate is the better tool than a gentle ready-to-use spray.
4. All-in-one or one product per surface
An all-in-one interior cleaner is a genuinely good product for maintenance. It is formulated mild enough not to damage a screen bezel or a soft-touch plastic, which necessarily means it is not the strongest thing you can put on a filthy floor mat. That is a design decision, not a flaw. The mistake is expecting it to be both.
Practically: if you clean your interior every few weeks, one all-in-one and a brush covers almost everything, and a three-bottle kit is more choice than you will use. If you are reviving a car that has not been cleaned properly in years, one bottle will not do it, and a kit that separates the protectant, the strong cleaner and the glass cleaner is doing you a favor by not pretending otherwise. There is a longer version of this argument in build your own kit vs a pre-made kit, which applies to interiors just as much as it does to a wash setup.
5. A kit is only good value if you would have bought most of it anyway
This is the honest test, and it is worth doing before you click buy. Write down what is in the kit. Cross off anything you already own or would never use. If more than about a third of the box is crossed off, the kit is more expensive than buying the remainder separately, no matter what the bundle discount looks like. Air fresheners, third towels and duplicate applicators are the usual culprits.
The comparison people usually reach for is a professional detail, and it is a fair one. Published pricing tiers put a basic interior-and-exterior detail at roughly $100–$150, so most interior kits cost meaningfully less than a single visit and are reusable for years. That is a real argument for buying one. It is not an argument for buying a bigger one than you need.
6. The thing no interior kit includes
None of these kits contains a vacuum, and every one of them assumes you have already used one. Cleaning a dirty interior with a spray before vacuuming it turns loose grit into mud and pushes it further into the fibers, which is genuinely worse than doing nothing. If the only vacuum you own is a 12-volt unit that plugs into the accessory socket, that is the gap to close before you buy any of this — the car vacuums roundup covers what actually pulls grit out of a seat seam.
Two of the kits here also assume a cordless drill, because their agitation comes from a drill-driven brush or pad rather than your hand. That is a real advantage on cloth and leather, and a real prerequisite. If you do not own a drill, those two kits are incomplete for you in a way the listing will not tell you.
7. Using one without making things worse
Order matters more than product choice. Vacuum thoroughly first, including the seat seams and under the seats. Work top to bottom so anything you knock loose falls onto surfaces you have not done yet. Spray the towel or the applicator rather than the surface, which keeps overspray off screens, infotainment bezels and glass. Agitate with a soft brush on anything textured, then wipe with a clean face of the towel, turning it often.
Do glass last, with its own towel, once the sprays that cause the film are finished. And test anything new on a hidden section — under a seat, or the far corner of the trunk carpet — before you do a whole panel. If you would rather start from gentler chemistry generally, the EPA’s Safer Choice program is a reasonable filter to apply. The full routine is in how to clean a car interior.
The short version
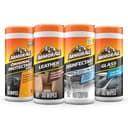
If you own nothing, buy a complete kit with brushes and towels in it and stop thinking about it. If you own tools already, buy chemistry and skip the bundled duplicates. If one surface in your car is the actual problem, buy the kit built for that surface rather than a general one that treats it as an afterthought. And if the interior is basically fine and you just want to keep it that way, wipes in the door pocket will do more good over a year than a large kit in a cupboard that comes out twice.
None of these is a compromise. They are answers to different questions, and the reason kit shopping feels confusing is that the packaging works hard to hide which question is being answered. Count the tools, check the surfaces, and the choice gets easy.