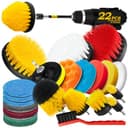
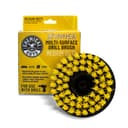
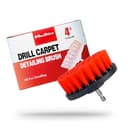
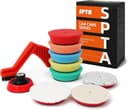
How to choose a drill-attachment detailing kit
1. Work out whether you need bristles or foam
This is the decision, and everything else is detail. Bristle attachments are for surfaces that hold dirt inside a texture: carpet, floor mats, cloth seats, rubber trunk liners, wheel wells, door jambs and the seal channels around a door. A flat towel only ever touches the high points of a textured surface; a spinning brush gets between them. That is the whole reason this category exists.
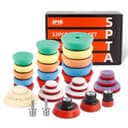
Foam pad attachments are for spreading a liquid evenly over a smooth surface: wax, sealant, glaze. They do the same job as a hand applicator, faster and more consistently. What they do not do is correct paint, and the gap between those two things is where people damage cars. More on that below, because it matters more than any pick on this page.
If you are buying one thing and cannot decide, buy bristles. The time-saving on an interior is dramatic and the risk is low. The time-saving on wax application is real but modest, and the risk is not.
2. Match the stiffness to the surface, not to the dirt
Attachment sets are usually sold in three stiffness grades, color-coded in a way that varies by brand, so read the description rather than the photo. The instinct is to pick stiffness based on how dirty the surface is. That is backwards: pick it based on what the surface is made of, then let the chemistry and dwell time do the work that extra stiffness would have done.
- Soft— leather, perforated seat inserts, soft-touch plastic, painted door jambs, headliner. Anything you would be upset to see scuffed.
- Medium— cloth seats, carpet, rubber floor mats, door seals, most trim. This is the single most useful grade and the one to buy if you buy only one.
- Stiff— wheel wells, tire sidewalls, the undersides of rubber mats, concrete. Keep it away from anything inside the cabin.
Worn cloth is the trap. A seat that has already gone slightly fuzzy will get fuzzier under a medium brush at high speed, and it does not go back. Start on the least visible part of the seat — the outer edge of the base, under the front lip — at the lowest speed your drill will hold, and increase only if nothing is happening.
3. Check the thread and the adapter before you check the price
The most common bad review in this category is not about performance, it is about fitment. Drill brushes come with either a hex shank that goes straight into a chuck, or a threaded post — usually M8 or 5/8-11 — that needs a matching adapter. The listing states the thread; the photo does not. Buying a threaded brush with no adapter and no way to mount it is an easy and very annoying mistake.
Multi-piece sets almost always ship with the adapter and an extension bar, which is one of the quiet arguments for buying a set first even if you only want one brush. The extension matters more than it sounds: without it, your knuckles are the thing that reaches the back of a footwell.
4. A drill is not a polisher, and this is not a small distinction
A dual-action polisher moves the pad in two motions at once, so no point on the pad stays in contact with one spot on the paint. That is a safety mechanism, not a marketing feature: it is what stops heat building in one place. A drill has one motion, in one direction, with no orbit and usually no meaningful speed control. Point a cutting compound at clear coat with one and you can burn through an edge in seconds.
So the honest scope of a drill polishing pad kit is applying a protective layer, not removing anything. Wax, sealant and glaze: yes, at low speed, with light pressure, keeping the pad moving. Compound and polish: no. If the swirls are the actual problem, that is a job for a dual-action polisher, and polishing by hand is a safer stopgap than a drill in the meantime. Our paint correction for beginners guide explains why the machine's motion is the part you are paying for.
The one legitimate exception is the mini-pad kit above, on very small areas — a mirror cap, a door handle recess, a bumper corner — where no full-size machine physically fits and the alternative is your fingertip. Even then: low speed, light pressure, never stationary.
5. Buy the chemistry that assumes a drill, not just a brush
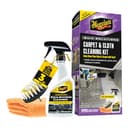
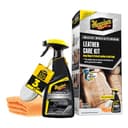
Two of the picks here are not attachments at all — they are chemistry kits that ship with a drill attachment, because the manufacturer designed the product around mechanical agitation. That is a different proposition from buying a brush and pairing it with whatever spray you own, and usually a better one for a specific surface: a cloth kit's cleaner is formulated for the dwell time a drill brush gives it, and a leather kit's disc is soft enough not to damage a coated hide.
If you would rather buy the pieces separately, the upholstery and carpet cleaners roundup covers the chemistry side, and the leather cleaners and conditioners roundup covers the other one. Either pairs fine with a medium brush from this page.
6. What a drill will not fix
Agitation moves dirt out of a fiber. It does not remove it from the car. On carpet and cloth, whatever the brush lifts has to be extracted — with a wet vacuum, an extractor, or at minimum a lot of dry towel pressure — or it settles back in as the surface dries and you have achieved a slightly cleaner-looking stain. This is the reason drill-brush results look spectacular in a video and disappointing in a driveway: the video has a vacuum in it that the driveway does not. See shop-vac and Shark vacuum setups for the extraction half of the job.
It also will not fix a wash. Nothing in this category touches paintwork safely except the wax pads, and the swirls you are trying to hide under that wax came from washing. The two-bucket method is what stops them appearing in the first place, and it is worth more to your car than every attachment on this page put together.
Using one without wrecking something
The failure modes are predictable, which means they are avoidable:
- Start slow. Squeeze the trigger gently and stop at the lowest speed that does anything. Most damage in this category is a speed problem, not a stiffness problem.
- Let the brush do the pressing. Leaning on it bends the bristles flat so the tips stop working and the base of the brush drags across the surface instead.
- Keep it wet. Dry-brushing dusty carpet grinds grit into the fiber. Spray the surface, let the cleaner dwell, then agitate.
- Test somewhere hidden. Under the seat, the back corner of the trunk liner, the inside of a mat. Every time, on every new surface.
- Eye protection. A spinning brush loaded with cleaner throws it, and it will find your face. This is the one piece of safety advice everybody skips.
- Vacuum first and last. Before, so you are not turning dust into mud; after, so what you lifted actually leaves.
Is it worth it?
For interiors, comfortably yes. Published pricing tiers put a basic professional interior-and-exterior detail at roughly $100–$150, and the whole brush side of this page costs a fraction of one visit. The attachments outlast the drill.
For paint, the answer is narrower and worth stating plainly: a drill pad kit is a wax applicator that spins. If that is what you want, it is cheap and it works. If you were hoping it would replace a polisher, it will not, and the money is better saved toward the real tool. That is the same reasoning we apply in build your own kit vs a pre-made kit — buy the thing that does the job, not the thing that resembles it.