Car Detailing Checklist
A run sheet rather than an article. Every step in the order that stops you doing anything twice, what each one needs, and honest notes on which lines you can skip on a maintenance detail without the result changing.
How this is funded:we earn a commission if you buy through our links, at no extra cost to you. It never changes which product we recommend, and we’ll tell you plainly when we’d skip one. Full disclosure.
How to use this
This is in dependency order, not importance order. Each block assumes the one above it is done, and the sequence is designed so nothing you clean gets dirtied again by a later step. Work down it and you will not find yourself re-rinsing a panel because wheel cleaner drifted onto it, or chasing wax overspray off glass you already did.
Lines marked (deep only) belong to a full detail and can be skipped on a maintenance one. Realistically that is two or three times a year for most cars, with everything else happening every couple of weeks.
Before you start
- Park in shade, or wait for the car to cool. Hot panels flash-dry every product you apply.
- Two buckets, both with grit guards, one soap and one rinse.
- Towels laid out and sorted — paint towels separate from wheel towels, permanently. More on that in washing microfiber.
- Everything within reach. Walking back to the garage mid-panel is how products dry on.
Exterior
1. Wheels, tires and wheel wells — first, always
- Rinse the wheels and arches before anything else.
- Wheel cleaner on, allowed to dwell, agitated with a dedicated wheel brush.
- Barrels and the inner face, not just the outer face. This is the line most people skip.
- Tires scrubbed with a stiff brush and an all-purpose cleaner until the foam runs white.
- Wheel wells, with the same APC and a long brush.
- Rinse everything thoroughly before the cleaner dries.
Wheels come first because wheel cleaner and loosened brake dust land on the lower panels, and because the brushes and towels involved are the dirtiest things you will touch all day. See how to clean wheels and tires and the wheel cleaner picks.
2. Pre-wash
- Full pre-rinse, top to bottom, to remove loose grit.
- Bug and tar spots treated individually and allowed to dwell (deep only).
- Foam the whole car and let it sit. Do not let it dry.
- Rinse the foam off completely.
This block exists to remove as much as possible before anything touches the paint, and it is the single biggest contributor to a scratch-free wash. Nozzle and distance matter here — what PSI to pressure wash a car covers both.
3. Contact wash
- Two buckets, grit guards in both.
- Top panels first, lower panels last, straight-line passes rather than circles.
- Rinse the mitt in the rinse bucket after every panel.
- A separate mitt or sponge for the lower skirts and bumpers.
- Final rinse, sheeting water off with the nozzle removed.
This is the stage where swirl marks are created, not the pressure washing. The two-bucket method is the whole argument.
4. Decontamination (deep only)
- Iron remover sprayed on the paint and wheels, left to react, rinsed.
- Clay bar or clay mitt over every painted panel with plenty of lubricant.
- Glass clayed too — it picks up more contamination than people expect.
- Re-wash or rinse to remove clay residue.
Do this by feel, not by schedule: if the paint feels gritty through a plastic bag after washing, it needs decontaminating. The decon guide has the test.
5. Dry
- Large drying towels, patted and drawn rather than dragged.
- Blower through mirrors, grilles, badges and trim gaps so nothing drips later.
- Door shuts, fuel filler and boot shuts dried by hand.
6. Correct (deep only)
- Inspect under a strong light at a low angle before deciding anything.
- Test spot first, with the least aggressive combination that could work.
- Work panel by panel, wiping and re-inspecting as you go.
- Wipe down with a panel prep or isopropyl solution before protecting.
See scratch removers for the depth triage and correction for beginners for the technique.
7. Protect
- Wax, sealant or coating on all painted surfaces.
- Thin, even coats. More product is not more protection.
- Buffed off with a clean plush towel before it cures hard.
- Trim dressed, tires dressed, and both wiped back so nothing slings.
8. Glass and final pass
- Exterior glass last, with an ammonia-free cleaner and two towels.
- Wiper blades wiped down.
- Walk the car in direct light at a low angle and fix what you find.
Interior
9. Strip it
- Everything out: mats, child seats, boot contents, door pockets, cup holder inserts.
- Mats cleaned separately, outside the car, and left to dry fully.
10. Dry removal
- Brush or drill-brush the carpet first so trapped grit and hair lift to the surface.
- Vacuum: seats, seat seams, rails, under the seats, the boot, the headliner if needed.
- Crevice and brush tools for vents, console seams and the gap beside the centre tunnel.
If there is a pet in the car, this block needs its own approach — hair is agitated loose before it is vacuumed, not sucked out directly.
11. Hard surfaces, top down
- Headliner only if genuinely dirty, and only lightly.
- Pillars, dashboard, instrument surround, console, door cards.
- Vents, switches and seams with a soft brush and a cloth.
- Spray the towel, never the panel — overspray lands on glass.
12. Fabric and leather
- Cloth: pre-treat stains, agitate, extract or blot dry. Do not soak.
- Leather: clean first, condition second, two separate products.
- Carpet last, because it catches everything from the steps above.
The failure mode here is water, not dirt — how to clean car carpet explains why a sealed cabin cannot dry, and steam is the low-moisture alternative.
13. Finish
- UV protectant on dash and trim, buffed matte rather than shiny.
- Interior glass last of all, including the inside of the windscreen.
- Mats back in only when completely dry.
- Doors left open to air out before closing the car up.
The three places people stop too early
Wheel barrels. The inner face of a wheel is half its surface and the first thing that makes a clean car look unfinished from the side.
Door shuts and sills. Nobody sees them in a photo and everybody sees them getting in.
The inside of the windscreen. It only shows when the sun is low, and then it shows constantly.
Stocking the list
Every line above needs a product, and assembling them one at a time is both slower and usually more expensive than starting from a kit and replacing pieces as they run out. The three below each cover most of this checklist in one box.
Kits that cover this checklist
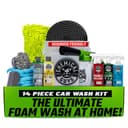
Best all-in-one start
Chemical Guys 14-Piece Arsenal Builder Car Wash Kit
A wash bucket, foam gun, several soaps, microfiber and dressings bundled at a real discount against buying each piece. It will not all be your forever gear, but it gets a beginner through most lines of this list safely on day one.
$124.99View on AmazonPrice as of October 4, 2026. #ad How we’re funded
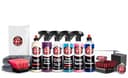
Best curated option
Adam's Polishes Essential Car Wash Kit
A matched soap, mitt, detail spray and microfiber from the enthusiast brand. You pay a premium over the bigger box, and in return nothing in it is a component you will want to replace immediately.
$89.24View on AmazonPrice as of October 4, 2026. #ad How we’re funded
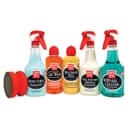
Best for the long run
Griot's Garage Starter Car Care Kit
Fewer gimmicks, solid wash-and-protect basics, and a brand known for standing behind its products. The pick if you would rather own six things you keep than fourteen you sort through.
$79.99View on AmazonPrice as of October 4, 2026. #ad How we’re funded
If you would rather build your own, the beginner kit page names one pick per line, and build versus buy does the arithmetic on both routes.
Frequently asked questions
What is on a professional car detailing checklist?
Exterior: wheels and tires first, pre-rinse, foam, contact wash, decontamination (iron remover and clay), dry, correct if needed, protect, then tires and trim and glass. Interior: everything out, vacuum with agitation, hard surfaces top down, fabric or leather, interior glass last. The order matters more than the list.
What order should you detail a car in?
Dirtiest to cleanest on the exterior — wheels before paint, because wheel cleaner and brake dust overspray land on lower panels. Top down on the interior, because dust falls. Glass last on both, because everything else you do will put something on it. Protection goes on at the very end of each half.
Do you clean the interior or exterior first?
Either, but do not interleave them. Finish one half completely before starting the other. The common mistake is doing both at once, running out of daylight during the interior, and closing a car up with damp carpet — which is how a clean car ends up smelling musty three days later.
What can you skip on a maintenance detail?
Decontamination and correction. Iron remover and clay are a two-or-three-times-a-year job, not an every-wash one, and correction is its own project. A maintenance detail is wash, dry, protect, interior — and a car kept on that routine needs the deeper steps far less often.
What do you need to detail a car for the first time?
pH-neutral soap, two buckets with grit guards, a wash mitt, drying towels, a wheel cleaner and brush, an interior cleaner, glass cleaner, a set of brushes and something to protect the paint with. A starter kit covers most of that in one box, which is usually cheaper than assembling it piece by piece.
How do you know when a detail is finished?
Three checks people skip: look at the paint from a low angle in direct light rather than straight on, run the back of a hand over it to feel for anything the wash left behind, and check the inside of the windscreen with the sun low. Those three find nearly everything a finished-looking car is still hiding.
Sources
- International Detailing Association — Detailing Resources — IDA's public detailing resource library (accessed July 19, 2026)
- Chemical Guys — Two Bucket Method Car Wash Guide — Manufacturer how-to on the two-bucket wash and grit guards (accessed July 19, 2026)
- Chemical Guys — How Much Does a Car Detail Cost? — On professional detailing prices vs DIY (accessed July 19, 2026)
Keep reading
How to Detail a Car, Start to Finish
The long-form version of this checklist, with the reasoning behind each step.
Read the guideThe Order of Detailing Steps
Why sequence saves more time than speed, and the steps people routinely do backwards.
Read the guideHow Long Does It Take to Detail a Car?
What to budget for each half of this list, and the one decision that doubles the day.
Plan the dayThe Beginner Detailing Kit
One pick per line on this checklist, costed out against a single professional detail.
See the kit