How to choose an engine degreaser
Four questions decide this, and only one of them is about cleaning power.
1. Will it stay where you spray it?
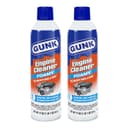
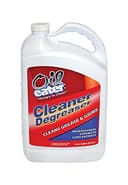
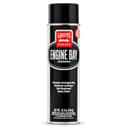
This is the question the category label hides. Every product on this page will dissolve engine grime given enough contact time; the difference is how much contact time each one gets before it runs off. An expanding aerosol foamis engineered for exactly this — Gunk’s listing describes a foam that “clings to surfaces for easy rinse,” which is a dwell claim dressed up as a convenience claim. A sprayed liquid, whether it is a citrus concentrate or an industrial alkaline, starts draining the moment it lands on anything that is not horizontal.
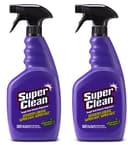
There is a workaround, and it is worth knowing before you spend more than you need to: spray a liquid degreaser onto a soft detailing brush rather than onto the bay, and work it in. You lose the no-touch convenience and gain back the dwell. That is the whole argument for buying the cheaper gallon instead of the aerosol, and it is a fair one if you do not mind the extra fifteen minutes.
2. Does the maker publish a dilution ratio?
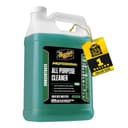
Half this category ships a gallon of concentrate and tells you nothing about how to mix it. That is not a small gap. Mixed too weak, a degreaser does nothing and you blame the product; mixed too strong, it will dull aluminum, stain a painted strut tower or bleach a plastic cover — and nothing in a bay is easy to replace.
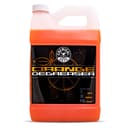
Only one pick here is backed by published numbers from the same manufacturer. Chemical Guys’ engine-bay guidance puts roughly 6:1 on heavy oil and 10:1 to 15:1on medium grime, and their Orange Degreaser is a dilutable product from the same brand. That pairing is the single most useful thing on this page, which is why that pick is second rather than sixth. Where a maker publishes nothing — and two of the gallons on this page do not — this page says so instead of inventing a ratio for them.
3. What is in your bay, plastic or metal?
Open a car built in the last twenty years and most of what you see is black plastic: an engine cover, an intake duct, a fuse box lid, a coolant bottle. Open a truck or an older car and you see far more painted metal, bare aluminum and bracketry. These want different strengths. Aggressive alkaline chemistry is the right answer for caked-on oil on a cast-iron block and the wrong answer for a molded plastic cover you want to still look black afterwards.
The practical rule: start with the weakest thing that works, and only escalate where you can see actual grease. A bay that is simply dusty with a film of oil mist — which is most bays — does not need an industrial degreaser at all.
4. What happens to the plastic afterwards?
This is the part the aisle never mentions. Degreasing works by stripping oils, and the plastics and rubber in a bay are full of oils that belong there. Strip them and the bay reads clean and looks gray — a chalky, washed-out version of itself that often looks worse than the dirt did.
Chemical Guys’ procedure ends by finishing with a water-based dressing on hoses and plastic covers, and that step is in the published method for a reason. It is also the honest limit of what any of this can do: DetailingWiki notes that where rubber has gone through actual vulcanization— the hard, cracked, permanently changed stage — it cannot be reversed, and “using a dressing will hide it a bit.” Hiding it a bit is a real result on a fifteen-year-old intake duct. Restoring it is not on the table, and no product on this page claims otherwise.
The method, in the order that matters
A degreaser is roughly a third of this job. The rest is sequence, and getting the sequence wrong is how people end up with a check-engine light and a story about how detailing products ruined their car.
- Cool engine, every time.Chemical Guys’ published procedure leads with it. A hot block flashes product off before it works and can thermally shock a plastic part; hot metal plus cold water is its own risk.
- Cover the electrics.Alternator, intake, fuse box, battery terminals — the published list. A plastic bag and a couple of elastic bands is the entire investment.
- Dry-remove the loose stuff first. Leaves, pine needles and grit out of the cowl and the corners, before they become mud.
- Degrease, then wait.This is the dwell step, and it is the one people cut short. Nothing on this page publishes a dwell time, which is a genuine documentation failure across the category — the workable approach is to keep the surface wet with product and not let it dry on anything.
- Agitate gently. Soft brushes, not a scrub pad. Our guide to using a detailing brush covers the technique: one direction, wet, and never dry-scrubbing a surface.
- Rinse low and gentle. Low pressure, away from electrical components, per the same published procedure. A pressure washer is usable here only in the sense that a 40-degree tip at distance behaves like a hose; a turbo nozzle in an engine bay is how connectors get flooded. If you are still picking a machine, Sun Joe vs Greenworks covers the two most-compared units and why the headline pressure figure is not the one to buy on.
- Dry, then dress. Compressed air or a leaf blower gets water out of the crevices faster than towels can, and the dressing goes on dry plastic.
Our full engine bay cleaning guide walks the same sequence in more detail, including what to cover and what to leave alone entirely.
What an engine degreaser is not
It is not an undercarriage product.They look like the same job and they are not. The underside of a car in a salt belt needs a flooding-volume rinse and corrosion chemistry, which is a different category with different tools — see undercarriage cleaners for that one.
It is not an interior product. Two of the six picks here are alkaline concentrates that will dry out and discolor a dashboard or a door card. If you want one bottle that moves between a bay and a cabin, that is what the all-purpose cleaner category exists for, diluted weak for inside and strong for out.
And it is not a trim restorer.A dressing adds a finish to plastic that is intact; a restorer is a different chemistry aimed at exterior trim that has already gone chalky. Chemical Guys’ own trim guidance notes that most trim restorers last “anywhere from a few weeks to a couple of months,” and that restorers will not reverse cracking or pitting — the same ceiling applies to anything you spray in a bay. If the parts you are trying to fix are on the outside of the car, trim restorers is the right page.
Our call
Buy the Gunk foamif you are cleaning one bay and want the shortest path to a good result — the clinging foam does the thing that actually matters here, and a case of two cans costs less than most single detailing-brand bottles.
Buy the Chemical Guys Orange Degreaser if you would rather control the strength, and especially if you are going to do this more than once. It is the only pick on the page where the manufacturer has published the ratios to use, which turns the hardest part of owning a concentrate into a decision rather than a guess.
Add the Griot’s dressing either way. It is the cheapest line item here and it is the one that makes the previous two hours visible. A degreased, undressed bay is the most common disappointing outcome in this whole job.