How to Remove Oxidation From Car Paint
Oxidation is paint that has died at the surface. No wash removes it and no wax fixes it - you abrade the dead layer off and seal what is underneath, and the only real question is how much you have to take.
How this is funded:we earn a commission if you buy through our links, at no extra cost to you. It never changes which product we recommend, and we’ll tell you plainly when we’d skip one. Full disclosure.
The short version
Oxidized paint is dead paint. UV light and oxygen break down the surface of the top layer until it stops reflecting as a smooth surface and starts scattering light as a chalky, microscopically rough one. That is why an oxidized panel looks faded in the shade and genuinely white in direct sun, and why it feels slightly rough under a flat hand.
Nothing you spray on it removes it. The fix is to abrade the dead layer away with a compound until you reach intact paint underneath, then put protection on top so it does not happen again. For most clear-coated cars that is one afternoon with a dual-action polisher, a polishing pad and a one-step compound. For badly chalked single-stage paint it is more aggressive, more dramatic and more satisfying.
The one thing to get right before you start: how much paint you have to spend. That is the whole safety story and it is the next section.
First, confirm it is actually oxidation
Three things look like a dull car and only one of them is oxidation.
Dirt and road film.Wash the panel properly before you diagnose anything. A surprising number of “faded” cars are a decade of unwashed road film, and a proper two-bucket wash plus a clay bar fixes them for the price of a bottle of soap.
Fine scratching. Thousands of tiny scratches scatter light the same way a rough surface does, and the car reads as dull rather than as scratched. The tell is that it looks worse in direct sun with visible swirl patterns, rather than uniformly chalky. That is the swirl mark problem, and while the fix is also abrasive, it is a gentler one.
Oxidation.The test: take a clean, damp microfiber towel and wipe a faded area with light pressure. If the towel comes away with chalky residue on it — and on single-stage paint, residue the color of the car — and if the paint looks temporarily darker where the damp towel passed, that is oxidation. The damp towel is briefly filling the microscopic roughness, which is exactly what a glaze does and exactly what polishing makes permanent.
The clear-coat budget
This is the part that should shape every decision that follows. DetailingWiki’s reference page on minimum paint thickness works through a representative system: roughly 120 micrometers of total paint, of which about 40 micrometers is clear coat, and approximately 10 micrometers removed each time you polish.
The wiki is careful, and so are we: it explicitly argues against publishing a single universal minimum-thickness number and recommends measuring the panel you are working on instead. Paint systems vary by manufacturer, by model year, by panel and by whether the car has been repainted. But the shape of the arithmetic holds, and it tells you two things.
First, a car has a small number of full corrections in it, ever. Second, and more usefully: the least aggressive thing that works is always the right answer, because the difference between a mild correction and a heavy one is not effort, it is paint you never get back.
If the car is older, has been painted before, or you simply do not know its history, a paint depth gauge is the honest tool. Most people will not buy one, and the workable substitute is discipline: test a small area, step up slowly, and stop as soon as the panel looks right rather than chasing the last ten percent.
The method
1. Wash and decontaminate
Wash with a pH-neutral shampoo, then clay the panel. Running an abrasive over bonded contamination grinds that contamination through the finish, which installs scratches while you are removing haze. If the car has visible rust specks or industrial fallout, an iron remover comes before the clay.
2. Tape the edges
Paint is thinnest on edges, body lines and the crowns of curved panels, because that is where it flowed away when it was sprayed. Those are also where a machine naturally concentrates pressure. Low-tack tape on every edge, badge and trim junction costs ten minutes and prevents the one mistake that cannot be polished out.
3. Test one 2 x 2 ft section
Mildest combination you own — a polishing pad, a one-step compound, moderate speed, light pressure, four to six slow passes. Wipe the residue off and look at it in direct sun or under a single point light.
If the chalkiness is gone and the panel is glossy, you are done choosing: do the whole car like that. If it is better but not fixed, change the padto a more aggressive cut before you change the product — the pad is the cheaper and more reversible variable. Only if that fails do you move to a heavier compound, and at that point you have also committed to a finishing pass afterwards.
4. Work the car in sections
Panel at a time, overlapping passes, no pressure beyond the weight of the machine. Keep the pad clean — a pad loaded with spent compound and removed paint stops cutting and starts smearing. Swap or brush it out every couple of panels.
Check your work as you go rather than at the end. Oxidation does not come off evenly: horizontal panels are nearly always worse than vertical ones because they take the most sun, so the roof, hood and trunk may need a second pass while the doors are finished in one.
5. Finish, then protect immediately
Any aggressive cut gets a finishing polish on a soft pad afterwards. Then protect, in the same session, before the car goes outside again. This is not optional and it is not a sales line: oxidation is UV damage, and you have just removed the degraded layer that was, in a poor way, shielding what is beneath it. Bare polished paint starts the clock immediately.
What to use
Start here
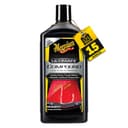
Meguiar's Ultimate Compound
The manufacturer states it works by hand or machine, which makes it the only sensible first bottle whether or not you own a polisher. On a clear-coated car with light to moderate oxidation this is frequently the entire answer, and it finishes clean enough that you may not need a separate polish afterwards.
$13.97View on AmazonPrice as of October 19, 2026. #ad How we’re funded
For chalky single-stage paint
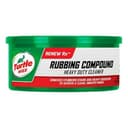
Turtle Wax Rubbing Compound (Heavy Duty Cleaner)
An aggressive, inexpensive cut for the case where the dead layer is thick and pigmented - older single-stage red, black and white that has gone gray. It will haze a modern clear coat, so this is specifically for the paint that needs it, and it always gets a finishing polish after it.
The finishing step
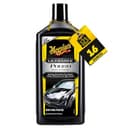
Meguiar's Ultimate Polish (Pre-Wax Glaze)
A pre-wax polish and glaze that removes the fine marks and towel haze an aggressive compound leaves behind, by hand or machine. On an oxidized car this is the step that converts 'no longer chalky' into 'glossy', and it costs almost no clear coat to do.
Protect it so it does not come back
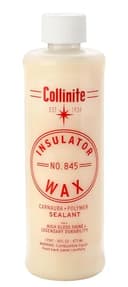
Collinite 845 Insulator Wax
Oxidation is UV damage, so the job is not finished until there is a durable layer on top. A long-life insulator wax is the straightforward answer for a car that lives outdoors, and it is the cheapest insurance available on an afternoon of work you do not want to repeat.
$20.95View on AmazonPrice as of October 19, 2026. #ad How we’re funded
When polishing will not fix it
Clear coat failure.This is the one people mistake for oxidation most often, and it is not repairable by polishing. Failed clear coat peels, flakes and shows sharp-edged patches with a visible boundary — often on a roof or hood, often with the paint underneath looking normal where the clear is gone. Polishing a failing clear coat accelerates it. That panel needs refinishing.
Paint worn through to primer. If a thin patch shows a different color underneath, stop. Nothing abrasive improves that.
Etching. Bird droppings and hard water can etch a pit into clear coat rather than sitting on it. If a mark has a sharp outline and the surface around it is glossy, it is etched, and our water spot guide covers how deep those go.
Our call
For a normal, clear-coated, slightly tired car: one bottle of Meguiar’s Ultimate Compound, a polishing pad, a dual action polisher, and a sealant or wax the same day. That sequence fixes the overwhelming majority of “my paint is faded” cars for the price of a tank of fuel.
For genuinely chalked single-stage paint: a heavy compound first, the finishing polish second, and protection applied more often afterwards than you would on a modern car — single-stage has no clear layer above the pigment, so the wax is doing work the car was never built with.
And in both cases: stop earlier than you want to. The thing you are spending is not time, it is paint.
Then keep it from happening again, which is cheaper than correcting it twice. How to protect car paint from the sun covers the three things you actually control — where the car parks, what layer is on it, and how you wash it.
Work safely. Detailing chemicals and machine polishers can damage paint, trim or your own skin if misused. Always follow the manufacturer’s instructions, test in an inconspicuous spot first, work out of direct sun, and wear eye protection and gloves where the label calls for them. Two Bucket Club is general guidance from an enthusiast, not a substitute for a product’s own directions.
Frequently asked questions
Can you remove oxidation from car paint without polishing?
No, and anything that claims otherwise is hiding it rather than removing it. Oxidation is a layer of paint whose surface has been degraded by UV and air - it is physically dead material sitting on top of the good paint. Washing does not lift it, because it is not dirt. A glaze or a heavy wax will temporarily darken it and make the car look dramatically better for a few weeks, which is a perfectly legitimate thing to do before a sale or on a car you do not plan to keep, but it is filling the texture rather than removing it. The only permanent fix is abrasive.
How can I tell if my paint is oxidized or just dirty?
Wipe a clean, damp microfiber towel across the dull area with light pressure. Three outcomes: the towel comes away dirty and the paint looks normal underneath, in which case you needed a wash; the towel comes away with a chalky, color-tinted residue on it, which is oxidation and on single-stage paint will be the color of the car; or the towel comes away clean and the paint still looks dull, which usually means fine scratching rather than oxidation, and that is a different fix. The second case is the one this guide is about.
How many times can you polish oxidation off a car?
Fewer times than most people assume. DetailingWiki works through a representative paint system of around 120 micrometers total with roughly 40 micrometers of clear coat, and puts a single polishing step at approximately 10 micrometers removed. The wiki deliberately refuses to publish one universal minimum figure and recommends measuring the panel instead, which is the right caution - but the direction of the arithmetic is why heavy correction is something a car gets a handful of times in its life, not annually. Protect the result and you will not need to do it again soon.
What is the difference between oxidation on clear coat and on single-stage paint?
On a modern clear-coated car, the oxidized layer is clear lacquer and your pad stays white. On single-stage paint - common on cars built before clear coat became universal, and on some commercial and fleet vehicles - the pigment is in the top layer, so your pad comes away the color of the car. That is the diagnostic. Single-stage also oxidizes far more visibly, going chalky gray on red and black especially, and it responds dramatically to an aggressive compound because you are removing dead pigmented paint rather than clear. It also has no UV-protective clear layer, so it needs reprotecting more often afterwards.
Can oxidation come back after polishing?
Yes, and it will if you leave the paint bare. Oxidation is UV and oxygen attacking the surface of the paint, so the clock restarts the moment you finish polishing - freshly abraded paint has no protection on it at all. Apply a sealant, a wax or a coating in the same session, and keep it topped up. A car parked outdoors in strong sun will oxidize again in a few years without protection, and essentially not at all with it.
Will a rubbing compound damage my paint?
It will remove paint, which is the point, and that is only damage if you remove more than you needed to. The rule that keeps you safe is to start with the mildest combination that could work - a soft pad and a one-step compound - test one small section, inspect it in direct light, and step up the pad before you step up the product. The two common ways people go wrong are starting with a heavy cut on a car that did not need it, and working an edge or a body line where the paint is thinnest. Tape your edges and stay off them.
Sources
- DetailingWiki — Minimum paint thickness — Detailing reference wiki on how much paint a correction step costs: a worked example of a 120 micrometer paint system with a 40 micrometer clear coat, and roughly “10 micrometer each time you polish”; it explicitly argues against publishing a single minimum-thickness number and recommends measuring the panel instead (accessed October 5, 2026)
- Chemical Guys — Two Bucket Method Car Wash Guide — Manufacturer how-to on the two-bucket wash and grit guards (accessed July 19, 2026)
- International Detailing Association — Detailing Resources — IDA's public detailing resource library (accessed July 19, 2026)
Keep reading
Best Polishing Compounds
The whole category by cut level, from a mild one-step to a heavy body-shop cut - with the compound that suits oxidized paint called out.
See the compoundsBest Polishing Compounds for Black Cars
Dark paint hides nothing, which flips the shopping criteria from cut to finish. The compounds sorted on how cleanly they finish down.
See the picksCompound vs Polish
Two words people use interchangeably that describe different abrasive jobs - and which one your paint actually needs.
Read the guideBest Car Polisher for Beginners
The whole first-time machine stack - polisher, pads, two liquids and the consumables you run out of on day one.
See the picks