How to choose a headlight restoration kit
1. First check that yours is a restoration job at all
Three different problems look identical from ten feet away, and only one of them is fixed by a kit.
Surface oxidation is the yellow, chalky haze that lives on the outside of the lens. Run a wet finger over it: if the lens looks temporarily clearer while wet, the damage is on the surface and abrasives will reach it. This is the job every product on this page is built for.
Internal fogging is condensation or a milky film on the inside of the housing, usually from a failed seal or a blocked vent. Wetting the outside changes nothing, and no amount of sanding will touch it, because the problem is on the other side of the plastic. That is a seal repair or a housing replacement.
Delaminationis the factory hard coat lifting in patches, so the lens looks like it is peeling or has a map of cloudy islands on it. A kit will fix this, but only by removing the remaining coating entirely — which means you are committed to reapplying protection and to maintaining it, forever. Going in knowing that is very different from finding it out in year two.
2. The abrasion is the easy half
Every complete kit here works the same way underneath the marketing: progressively finer abrasives cut away the degraded top layer of plastic, then a polish removes the scratches the abrasives just made. It is exactly the logic of compounding and polishing paint, with one important difference — polycarbonate is much softer than automotive clear coat, so it cuts faster, hazes more easily, and is far less forgiving of a coarse grit left un-refined.
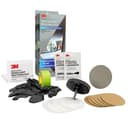
The practical consequence is that grit progression matters more than product branding. 3M’s published contents for its Ultra kit run 500 grit gold discs, then 800 grit white finishing discs, then a 3000 grit Trizact refining disc — a real progression, which is why that kit reaches damage the wipe-based kits cannot. If a kit jumps from a coarse pad straight to a sealing wipe, expect a lens that is clear but slightly milky, because the fine scratches are still there scattering light.
One thing no kit provides and every job needs: patience with the lubricant. Wet abrasion on plastic is not optional. A dry disc loads up, heats the surface and leaves marks a finer grit then has to chase.
3. What goes on top is the whole ballgame
This is the criterion to buy on. Once the abrasives have done their work the lens has no UV protection left at all, and bare polycarbonate yellows in direct sun measurably faster than a coated lens does. What the kit hands you for that last step falls into three tiers, and the listings deliberately blur them.
A wax or sealant wipe is the weakest. It is a protectant borrowed from paint care, it is not formulated as a UV barrier for plastic, and it wears off on the same timescale a spray waxdoes — weeks to a couple of months. A kit that finishes here is a kit you will be redoing.
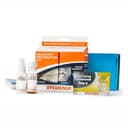
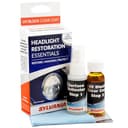
A dedicated UV clear coatis the middle and, for most people, the sensible tier. Sylvania sells one both inside its restoration kit and separately, and states its contents down to the ounce: 1.25 oz of surface activator, 1.25 oz of UV Block and three applicator towels. The company’s own framing is blunt — ultraviolet radiation and environmental elements are the biggest culprits damaging headlight lenses, so the coat exists to put that barrier back.
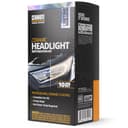
A ceramic coatingis the top tier and is what our overall pick finishes with. Cerakote publishes its kit contents plainly — eight step-one oxidation wipes, a sanding pommel, four discs in two grits, two ceramic coating wipes, enough to restore and protect two headlights — and backs it with wording no other brand here matches: “guaranteed to last as long as you own your vehicle, or we will refund/replace your purchase.” We have not aged a set of lenses for five years and neither has anyone else writing about this category, so treat that as the strongest published commitment rather than as proof. It is still a materially different promise from a wax wipe.
4. Hand kit or drill kit
This is the second real decision, and it is decided by how bad the lens is rather than by how confident you feel.
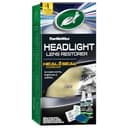
Hand kits— Cerakote, Sylvania, Turtle Wax — are right for the large majority of cars. They are slower, but slow is a safety feature on a part this soft, and there is no realistic way to ruin a lens with a hand pad. Sylvania states its kit takes less than 30 minutes and covers two headlight assemblies, which is about right for a normal car.
Drill kitsearn their place when the lens is deeply yellow, scratched or crazed and hand work has already stalled. The 3M kit’s 3.25-inch disc pad holder mounts in an ordinary household drill and cuts far faster, and that speed cuts both ways: keep it moving, keep it wet, and stop before you think you need to. Note that a drill is a rotary tool, not a dual-action polisher — it spins in one direction with no orbital motion and usually no speed control, which is tolerable on a small flat lens and a bad idea on paint.
5. Mask before you touch anything
The 3M kit includes masking tape and this is not packaging generosity. A 500 grit disc against an adjacent painted fender does damage that a headlight kit cannot undo and a scratch guide will tell you needs a body shop. Tape the full perimeter of every lens, two layers where the gap is tight, and check the tape is still intact between grits.
Wash and dry the car first, too. Sanding grit into road film is how you turn a 30-minute job into a two-hour one, and the surface has to be clean and dry for any coating to key to it — the same rule that governs decontaminating paint before you polish it.
6. What restoration cannot do — the number nobody quotes
Here is the part most pages in this category leave out, and it is the single most useful thing on this page. AAA tested restored headlights and found that professional and DIY restoration returned light output to approximately 70 percent of a new headlight. Replacing the lenses with original-equipment parts returned it to 100 percent. Aftermarket replacements landed between 83 and 90 percent, but failed some light- intensity requirements and were more likely to throw glare at oncoming traffic.
AAA also found that both restoration methods produced more glare than DOT criteria consider acceptable. That is a real finding and it deserves to sit in plain sight on a page selling restoration kits: sanding a lens changes its optical surface, and a restored lens scatters light in ways a molded one does not.
So the honest framing is this. Going from 20 percent to 70 percent of new light output, for around the price of a tank of fuel, is one of the best safety-per-dollar purchases available to anyone with an older car — and it is still not as good as new lenses. If your headlights are severely degraded, if the car is one you plan to keep for a decade, or if the housings are cheap for your model, price up OEM replacement before you buy a kit. For most cars that quote will make the kit look very attractive; for a few it will not, and you deserve to know which one you own before you spend an afternoon sanding.
7. Restoring is a one-off; keeping it clear is the habit
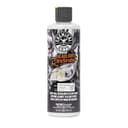
Whatever you finish with will eventually need renewing, because every headlight coating is a sacrificial layer facing directly at the sun. That is what the 16 oz bottle in this list is for: once a lens is clear, a no-sanding restorer and protectant is a two-minute top-up that keeps haze from ever getting a foothold, and at that surface area a bottle lasts years.
Two habits stretch the interval further at no cost. Park facing away from the afternoon sun where you have the choice, since UV exposure is the entire failure mechanism. And keep the lenses genuinely clean — road film and bug residue scatter light too, which is why glass and lens cleaning is worth doing on the same schedule as the windshield rather than once a year.
If the lenses are already clear and you simply want them to stay that way, skip the kits entirely. The standalone UV clear coat is the cheapest insurance in this category, and applying it to a healthy lens is far easier than rescuing a dead one.
The short version
For a normal car with normal yellowing, buy the kit whose last step is a real coating rather than a wax, and do the whole job in one afternoon: wash, mask, abrade wet through every grit in the box, and coat. That is our top pick and the reason it is the top pick has nothing to do with how well it sands.
If the lenses are badly gone, buy the drill kit for its 500-to-3000 grit progression and then buy protection separately, because the finishing step is where that kit is weakest. If they are only lightly hazed, do not sand anything — use the bottle. And if you have already restored your headlights and finished with nothing, the standalone UV clear coat is the missing step, and it costs less than doing the job twice.
Then set a reminder for a year out. Headlight restoration is not a repair that stays done; it is maintenance with a long interval, and the people whose headlights still look good in five years are the ones who treated it that way.