How to Clean Detailing Brushes
A detailing brush is a grit trap by design. The bristles fan out to reach a crevice and then funnel everything they collect down into the ferrule, where you cannot see it and water does not reach it. That buried grit is why a soft brush can leave fine scratches on a dashboard - and the fix takes two minutes per brush.
How this is funded:we earn a commission if you buy through our links, at no extra cost to you. It never changes which product we recommend, and we’ll tell you plainly when we’d skip one. Full disclosure.
Why a clean brush matters more than a soft one
People buy soft bristles for safety and then stop thinking about the brush. The bristle is not usually what marks a surface. What marks a surface is the grit the brush is carrying, and a detailing brush is unusually good at carrying grit because of how it is built.
Follow the geometry. The bristles splay outward to reach into a vent slat or a panel gap, which means that as you work, anything they dislodge travels inwardand downward toward the ferrule — the metal or plastic collar clamping the bundle to the handle. That is the one place you cannot see, cannot easily reach, and will not flush by rinsing the tips. Over a few sessions a brush builds a reservoir of fine grit at exactly the point where the bristles are stiffest and least able to flex around it.
Then you press the brush into a dashboard, and the grit at the base is dragged across the surface under all the pressure your hand is applying. Soft boar hair does not help; it is the passenger, not the problem. This is the same mechanism that makes a loaded wash mitt dangerous on paint, which is the whole argument behind the two-bucket method, and it applies in miniature to every brush in your kit.
The cross-contamination rule, which matters more than washing
Before any technique, one rule that no amount of cleaning substitutes for: a brush that has touched wheels, tyres or an engine bay never goes back on an interior or on paint. Not after a wash. Not after two.
Brake dust is metallic and sharp, and it embeds in bristle and ferrule in a way organic dirt does not — how to remove brake dustexplains what it actually is and why it bonds. Chemical Guys makes this point for microfiber — separate the paint-safe towels from the wheel, engine and heavily soiled ones before washing — and the logic is identical for brushes, with the added problem that a ferrule hides what a towel displays. Tyre dressing is the other offender: silicone residue transfers happily to glass and trim, where it smears.
So mark your brushes. A dot of paint on the handle, a wrap of coloured tape, separate storage — anything that survives being wet. Dedicate one or two to wheels permanently; those have their own dedicated shapes anyway, which is what best wheel brushes is for. Keep the soft interior set for interiors. Brushes are among the cheapest items in detailing, and buying a second set is less expensive than polishing a scratched dashboard, which is not a thing you can do at all.
The routine, step by step
1. Dry first, always
Flick the bristles against your palm and run a finger through them before any water touches the brush. Hair, crumbs, leaf fragments and dry grit all come out easily while they are dry. Add water first and you turn the same material into a paste that travels toward the ferrule instead of away from it.
2. Flush the ferrule, not the tips
Hold the brush bristles-down under warm running water and work your fingertips into the base of the bundle, right where it enters the collar. Splay the bristles apart with your thumb and let the water get in behind them. This is the step everybody skips and the only one that addresses the actual problem.
Warm, not hot. The guidance for microfiber is instructive here: trade press advises a wash temperature that should never exceed around 105 degrees Fahrenheit, and Chemical Guys recommends warm rather than hot water to break down waxes and polish residue without damaging fibres. Brushes have their own reasons to agree — hot water softens the adhesive holding the bristle bundle, and natural bristle deforms.
3. Wash in a weak APC dilution
Mix a weak dilution of all-purpose cleaner in a cup or a small bucket — interior strength, not wheel-well strength — and swirl the brush through it, massaging the bristles between your fingers. What you are lifting is a mixture of road film, interior dressing, protectant and skin oils, and a weak APC is formulated for precisely that. The APCs we rank, and the dilution logic behind them, are in best all-purpose cleaners.
Three things to keep away from brushes. Bleach, which attacks bristle and strips colour — the microfiber trade guidance notes it will take the colour out of a cloth, and natural bristle fares no better. Solvents and strong degreasers, which are hard on natural bristle and on the glue in the ferrule. And fabric softener, which has no business anywhere in a detailing cupboard; it coats fibres and destroys their ability to pick anything up, which is covered properly in how to wash microfiber towels.
4. Rinse until the water runs clear
Back under warm running water, bristles-down, squeezing gently from the ferrule outward to push dirty solution out of the bundle rather than through it. Keep going until nothing cloudy comes out. A brush that still releases colour or cloudiness into clear water is still dirty, however clean the tips look.
5. Reshape while it is wet
Squeeze the bristles back into their original profile with your fingers — tapered brushes to a taper, flat brushes to a flat edge. Natural bristle sets as it dries, so a brush left splayed on a worktop dries splayed and loses the point that let it reach into a vent. Thirty seconds now saves the brush.
6. Dry bristles-down, and completely
Hang the brush or stand it in a jar bristle-end down. Water has to drain outof the ferrule, not sit in it. A ferrule left full of water loosens the adhesive, corrodes a metal collar and swells a wooden handle until the joint gives up — which is the real reason most brushes die, long before the bristles wear out.
No heat. Air dry only, and let it finish before storing. The same reasoning applies as for microfiber, where manufacturer guidance is low heat or air dry because high heat can melt or harden synthetic fibres: synthetic filaments deform and natural bristle goes brittle.
Natural bristle versus synthetic, in care terms
Most of the soft detailing brushes on the market are boar hair — the TAKAVU ten-piece and the SPTA five-pack both are — and natural bristle wants a little more respect: warm water rather than hot, mild chemistry rather than solvents, reshaping while wet, and the acceptance that a new set will shed a few hairs during break-in. That shedding is normal and we record it as a con on both of those entries; it stops.
Synthetic filament tolerates stronger chemistry and springs back into shape better, which makes it the easier material to look after. It is generally less soft at a given stiffness, which is why the delicate-surface sets tend toward natural bristle in the first place. Neither material changes the main job, which is getting grit out of the ferrule.
Drill brushes are a different proposition again. They are synthetic, stiff, used on carpet, mats and wheel wells, and they spin — so they fling their debris out rather than funnelling it in, and they live permanently on the dirty side of the contamination rule. Rinse, dry, and never let one near a panel. Drill attachment detailing kits covers what they are for.
When to retire a brush
Four honest signals. The bristles will not hold a shape after reshaping. The base of the bundle has gone stiff and splayed, which usually means a grit plug you are not going to flush out. The ferrule has loosened on the handle. Or it has lived on wheels and engine bays and you want it on an interior.
A ten-piece brush kit costs less than a bottle of wax. Retiring a doubtful brush is the cheapest decision in this hobby, and the sets worth buying in the first place are in best detailing brushes.
What the routine needs
The cleaner, cheapest per wash
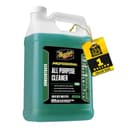
Meguiar's Professional D101 All Purpose Cleaner
A gallon of professional-line concentrate, so the cost per spray bottle of working solution is trivial — which is the point when you are washing brushes after every session. Dilute weak for brushes and interior panels, stronger for wheel wells. You need your own spray bottles and a dilution habit.
$24.99View on AmazonPrice as of October 10, 2026. #ad How we’re funded
The small-bottle option
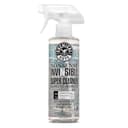
Chemical Guys Nonsense All-Purpose Cleaner
Colourless and odourless, which matters when the brush is going back onto a dashboard or a seat — nothing dyed, nothing perfumed. Dilutable, so one 16 oz bottle makes a lot of brush-washing solution. Dilute it correctly and spot-test; full-strength APC is potent.
$9.99View on AmazonPrice as of October 10, 2026. #ad How we’re funded
The interior set to keep clean
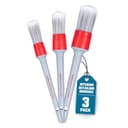
Chemical Guys All in the Details Detailing Brush Set (3-Piece)
Three sizes with soft bristles for vents, seams, emblems and trim — this is the set the contamination rule is written to protect, because it is the one that touches dashboards and paint. Not stiff enough for carpet or tyres, which is exactly why those jobs should get a different brush.
$21.99View on AmazonPrice as of October 10, 2026. #ad How we’re funded
The set to dedicate to dirty jobs
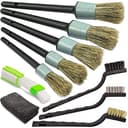
TAKAVU Car Detailing Brush Kit (10-Piece)
Ten boar-hair sizes for less than a bottle of wax, which makes it the sensible way to own a second, permanently dirty set for wheel faces, arches and engine bays so your interior brushes never go near brake dust. Budget handles and ferrules, and some break-in shedding is normal.
The short version
Dry debris out first. Flush the ferrule, not the tips. Weak APC, warm water, massage the bristles. Rinse until clear. Reshape while wet. Dry bristles-down, no heat, completely. And keep wheel brushes away from interiors permanently, because that is the one problem washing does not solve.
Frequently asked questions
How do you clean car detailing brushes?
Knock out the dry debris first, flush the base of the bristles where they enter the ferrule under warm running water, wash in a weak dilution of all-purpose cleaner while massaging the bristles, rinse until the water runs clear, reshape the bristles by hand, then dry bristles-down so water drains out of the ferrule instead of sitting in it.
Can you put detailing brushes in the washing machine?
No. A washing machine will not flush grit out of a ferrule — it tumbles it, which can loosen the glue holding the bristle bundle and bend natural bristle permanently. Brushes are a two-minute hand job. Microfiber towels are the thing that belongs in the machine, and that has its own rules.
What should you use to clean detailing brushes?
A weak dilution of the all-purpose cleaner you already own, at interior strength rather than wheel-well strength. It is designed to lift exactly the mix of road film, interior dressing and body oils that brushes collect. Avoid solvents and degreasers on natural bristle, and avoid anything with bleach, which attacks the bristle and the colour.
Why do my detailing brushes scratch?
Almost always buried grit rather than the bristles themselves. A brush funnels everything it picks up down into the ferrule, and that grit then rides between the bristle bundle and whatever you are cleaning. The second cause is cross-contamination: a brush used on wheels or an engine bay carries metallic brake dust, and that brush should never touch an interior panel or paint again.
How often should you clean detailing brushes?
After every use, at least a rinse and a reshape. A full wash with all-purpose cleaner whenever you have used them on anything greasy, dressed or heavily soiled. Grit left to dry in a ferrule sets into a hard plug, and that is both harder to remove later and the thing that marks surfaces next time.
How do you dry detailing brushes?
Bristles pointing down, air dry, completely. Bristles-down lets water drain out of the ferrule rather than pooling in it, which is what loosens glue and corrodes metal collars. Do not use heat — natural bristle and synthetic filaments both deform, and the handle joint is usually glued.
When should you throw a detailing brush away?
When the bristles will no longer hold a shape after reshaping, when the bundle has gone splayed and stiff at the base, when the ferrule has loosened on the handle, or when it has been used on brake dust or an engine bay and you want it anywhere near an interior. Brushes are cheap and clear coat is not.
Are boar hair brushes harder to care for than synthetic?
Slightly, and in one specific way: natural bristle sets as it dries, so reshaping while wet matters more, and it dislikes solvents and hot water. Synthetic filaments tolerate stronger chemistry and recover their shape better. Both share the real problem, which is grit in the ferrule.
Sources
- Chemical Guys — How To Wash Microfiber Towels: Keep Them Soft And Scratch-Free — Manufacturer laundering guidance: “Use warm water, not hot, to help break down waxes and polish residues without damaging fibers”; “Choose a microfiber-safe detergent without fabric softeners, fragrances, or additives”; “Never use fabric softener or dryer sheets. These coat the microfiber strands, reducing their ability to trap dirt and absorb water”; “Dry towels on low heat or air dry them completely. High heat can melt or harden synthetic fibers”; separate paint-safe towels from wheel, engine or heavily soiled towels before washing (accessed October 5, 2026)
- Professional Carwashing & Detailing — How to properly wash and care for microfiber towels — Trade-press guidance (Maria Woodie, March 1, 2016): microfiber should be washed in cold or warm water and the temperature should “never exceed around 105 degrees Fahrenheit”; wash separately from other fabrics, especially cotton; “Fabric softener will actually clog the small wedge-shaped filaments of the microfiber and render it useless”; no bleach, because it “will take the color out of the cloth”; dry on the “coolest setting, either permanent press or air fluff” because “high heat will cause melting, which will close the wedge-shaped fibers”; a properly maintained towel lasts “approximately 500 washes” (accessed October 5, 2026)
- International Detailing Association — Detailing Resources — IDA's public detailing resource library (accessed July 19, 2026)
Keep reading
Best Detailing Brushes
The sets worth looking after, including the boar hair kits and what each size is actually for.
See the brushesHow to Wash Microfiber Towels
The other tool that gets dirtier than what it cleans, and the one mistake that kills a towel outright.
Read the guideBest All-Purpose Cleaners
The one concentrate that washes your brushes and most of the interior, diluted to strength.
Compare the APCsHow to Clean a Car Interior
Where brush work fits in the wider interior routine, and which surfaces need which bristle.
Read the method